Add collection details
- In the menu, expand Base Modules > Distribution > Masterfiles >Database Management > Database Management > Item Masterfiles >Customer Masterfiles >Customer Masterfiles and double-click CM Masterfile maintenance. DSM005 Customer Masterfile Maintenance panel appears.
- Enter the Customer no in the field provided.
- Click option A/R Collection Maintenance. A/R Collection Maintenance panel is displayed.
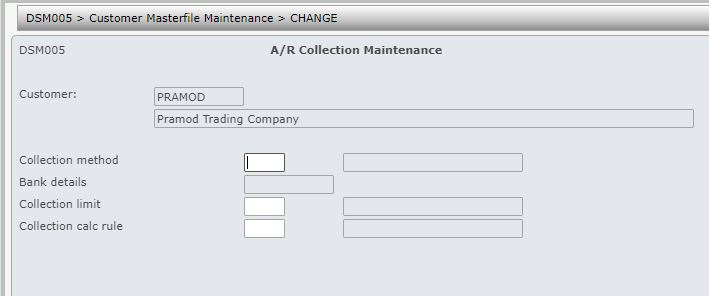
| Field | Description |
| Collection method | This field is populated if the customer is to be part of Automatic A/R collection. If left blank, the customer will not be selected for automatic collection. The codes for collection method are set-up in control file TMSDS/CM-CLMT. |
| Bank details | This is a hash key generated by the system which is key for file (XABKA00P) that has the customer bank details. Use Bank dtl function to update the bank details. The information captured for the bank details are user configurable and can be set-up in control files ********/PMBNKV1, 2, and 3. The function name to be used for this process in control file ********/PMBNKV1 is ‘AR-AUTCOL’. |
| Collection limit | The code for this field will have a corresponding amount in the control file TMSDS/CM-CLLM. This is the maximum amount that can be automatically collected at any one time from the customer. |
| Collection calc rule |
A flag to indicate if credits are to be included or excluded in the collection amount limit. The codes are set-up in control file TMSDS/CM-CLCR. |
- Enter the above information, as required.
- Click Bank dtl to enter the details for the collection method entered. Bank details is mandatory when the collection method is entered and the details required is dependent on the collection method entered.
Depending on your payment gateway the system will prompt for the following information.
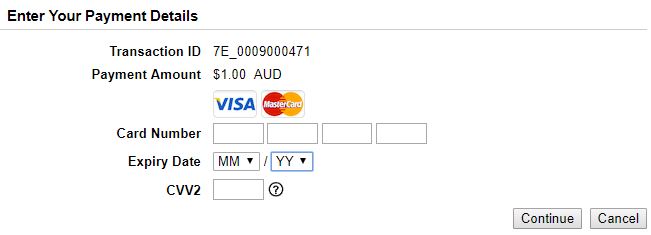
- Enter the payment details and click Continue. To validate the credit card, the system will pre-authorise a small amount as shown below.
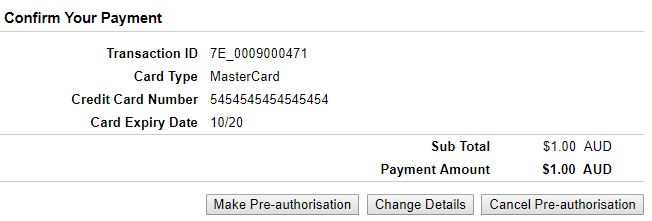
- Click Make Pre-authorisation to continue.
The system will display the appropriate message on success/failure of the verification.
