Contents
This program is used to setup control files or business rules in an application. Control files determines how processes function within an application in IP1 system. Each field on the control file has individual attributes and validation. There are four attribute/validation definitions for each field as follows:
- Value type: Alpha (Upper, lower or both cases), or numeric (unsigned or signed) or unicode.
- Mandatory or optional.
- Allow or disallow ‘*’
- Cross validation of value against
- Another control file
- User defined selection list
- Masterfile
- Role or
- No validation
Each Control File is also validated for duplicate records and user defined maximum number of records.
Add an application
- In the menu, expand Other Options > Cross Applications Support > Control Files and then select Control File Maintenance. XAW005A Work with Control File panel appears, listing all the existing applications.
| Option | Description |
| Detail | Accesses the selected application with the list of control files within the selected application. |
| Prints the control files within the selected application. | |
| Rename | Allows you to rename the selected application and its description. |
| Text | Allows you to maintain text at application level. |
| Function | Description |
| Add | Allows you to add a new application to add control files to. |
| Subset | Use this function to to get a filtered list of applications or a subset of applications with matching ID’s or description. |
- Press F6=Add. XAW005B Control File Maintenance panel appears in Add mode.
| Field | Description |
| Application | Identifier for the application; this ID identifies which module this application should be used with. |
| Application description | A brief description of the application you are adding. |
- Enter the above information and press <Enter>. The new application is added.
Add a new control file to an application
- In the menu, expand Other Options > Cross Applications Support > Control Files and then select Control File Maintenance. XAW005A Work with Control File panel appears, listing all the existing applications.
- Select the application you wish to add the control file to with option Detail.
- Press F6=Add to add the new control file. Control File Maintenance panel appears in add mode.

| Field | Description |
| Application | ID of the selected application to which you are adding the new control file to. |
| Control ID | Enter a descriptive identifier for the new control file up to 8 characters in length. |
| Control description | A brief meaningful description of the new control file. |
| Usage | Usage determines the whether the control file is system defined, mandatory, obsolete, optional or its for a customer modification. A control file can be mandatory for a specific function etc. Use F4=search to see the available system defined usage levels. |
| Maximum records | Maximum number of records allowed for this control file. Range of 0-999. |
| Allow duplicate codes |
Are duplicates records allowed in this control file? Valid choices are Yes/No. |
| L1/L2/L3 | These 3 levels determines the business levels i.e. the areas of use in a module and the functional area within the module where the control file is used. |
| Code headings | Up to 3 lines can be used for the column headings. Maximum of 20 characters. |
| Description headings | Up to 3 lines of descriptions can be entered for each of the columns. Maximum of 50 characters. |
| Code map | This identifies how many characters (alpha or numeric) are to be used in the actual definition of the control file. This can be uppercase or lowercase alphabetic or numeric. |
| Description map | The code description maps can now be unique code instead of the old BBB for alphanumeric and 9999 for numeric fields. The unique code for each column allows you to define different attribute/validation for each field. |
- Enter the above details for the new control file and press <Enter>. Control File Column Definition panel appears.

| Field | Description |
| Column O |
This will display a plus (+) or minus (-) sign. The plus when new columns have been added and information is required in the remaining validation fields. The minus sign is displayed when a column is deleted. Note that the information entered for the deleted column can be copied and pasted into a newly created column. |
| Column Seq | This is the sequence of the columns as displayed on the screen from left to right. |
| Column ID | The column id matches the entered alpha or the numeric code in the header. |
| Column Name | You can add up to 10 characters to assist in the further identification of the column. |
| Column Description |
Further identification can be added for each column description. |
| Value type | These are established in control file ********/CT-VLTYP. Do a F4=Search to select the appropriate value type. |
| M |
Is the entry mandatory in the detail section of the created control file for the selected column? The value flags are established in Control File ********/CT-MANF. |
| * |
Allow * meaning a wild card. Yes or No. The value flags are established in Control File ********/CT-ASTA |
| Validation T |
Does the column need to be validated: 1=None, 2=against another control file or 3= from the selection list, which the user creates, 4=masterfile, 5=Role. These codes are established in control file ********/CT-VTAB. |
| Validation Applctn |
When the validation 2 (above) is selected then the application for the control file must be entered. There is no search facility on this field. The application id should be identified before creating a new control File. When 3=from the selection List is used, the entry into the selection list is mandatory. When 4=masterfile is used, then the masterfile must be entered When 5=role is used, then the role function must be entered for validation. |
| Validation Key | This is the control id for the application or the key for the master file for validation. |
- Enter the above definitions and press <Enter> to save the control file.
| Option/Function | Description |
| Selection list |
This applies to validation 3, which requires entry in the selection list.
Code – codes to be used in the selection list. Note the length of the column. This should match the column heading created. Description – meaningful description that relates to the selection list code. |
| Show comment |
The user can add additional comments about each column that has been created. This consists of 4 lines with 50 characters per line.
|

Search facility
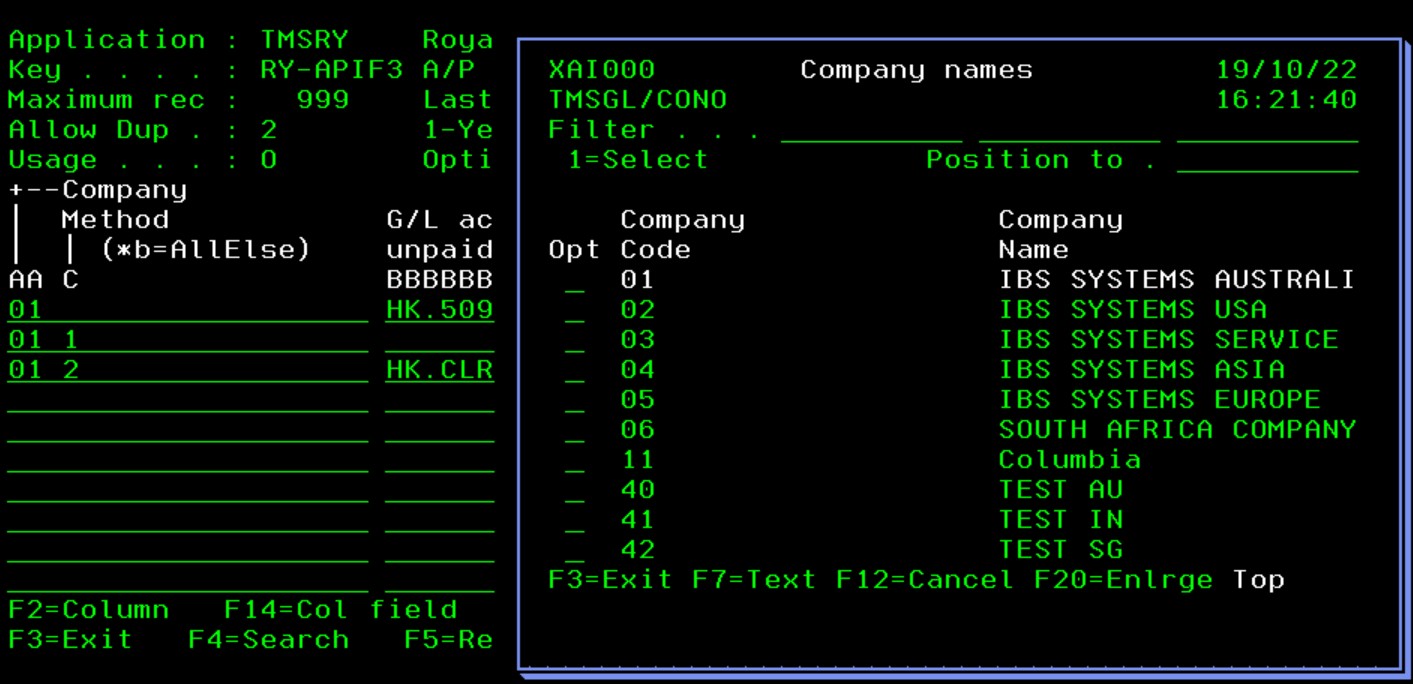
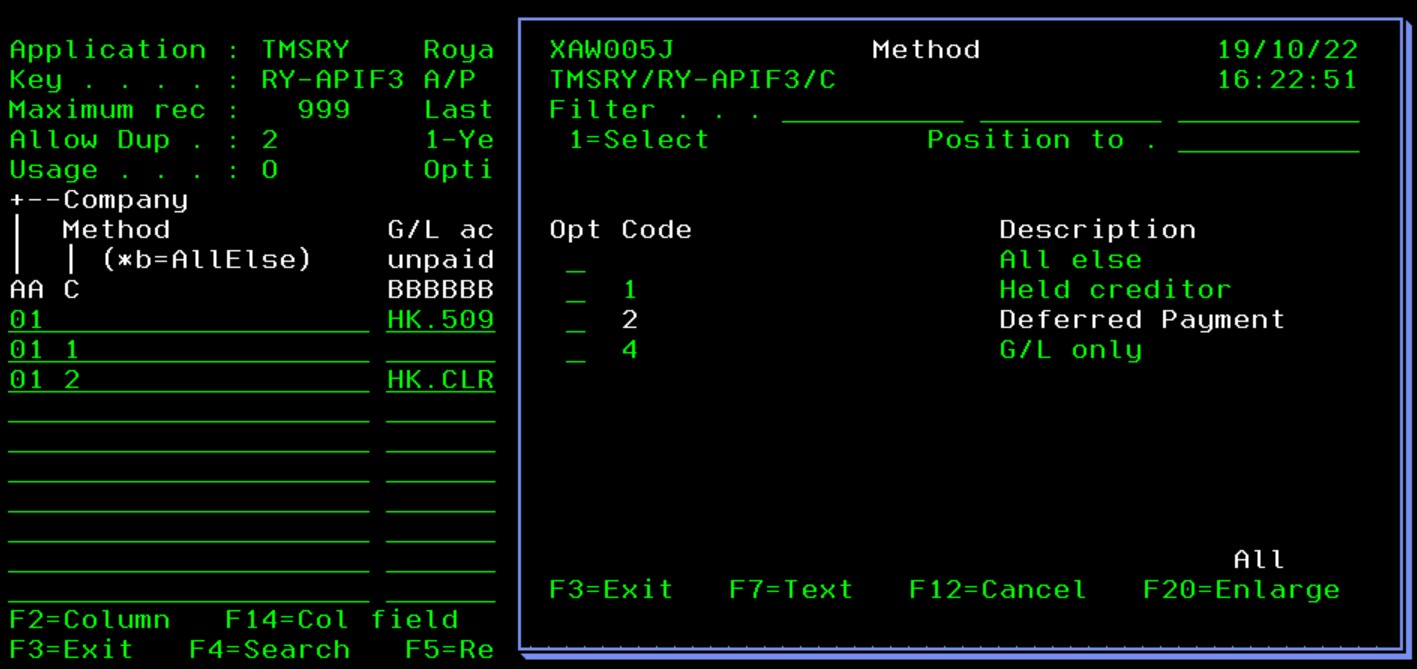
When using a validation with another control file, masterfile or a selection list, a Search facility is available for data input.
- Select the control file and press F4=Search for data input on the Company column (setup with validation to TMSGL/CONO above).
- Select the control file and press F4=Search for data input on the Method column (setup with selection list).
Column field maintenance
Function F14=Col Field allows you to maintain column field where the column is from control file or masterfile. For masterfile the masterfile processing program must be setup in ********/CT-VTAB4.
- Select the control file TMSRY/RY-APIF3 and press F14=Col field on column A (Company). The validation on column A is control file TMSGL/CONO, so the following screen will display which you can maintain if required,

Text
- To add general information on the control file, select the control file with option 1=Select and press F7=Text.

- To add text for the columns within the control file, select the control file with option 2=Change, press <Enter> and press F7=Show Comment.

- Enter the text for the 1st column and page down and enter text for the remaining columns.
Links
Control files can be categorized to make it easier to understand which control files are used by which modules/processes and whether it’s mandatory or optional for the specific processes within a release and the release it was changed in. The categorization is based on class levels that are defined in a set of system defined control files (********/XA-CL1 to (********/XA-CL5).
- Select the control file with option 2=Change and press <Enter>
- Class levels L1 to L3 is displayed on the upper right hand side of the screen. Use F4=Search to select the required class level.
- Class level 4 is maintained in the Usage field. Use F4=Search to select the usage to update.
- Class level 5 is maintained in the Release changed field. Use F4=Search to select the release for the update.
