Work with Bank Rec functionality has been developed to enable linking existing Bank side entries with GL side entries. It also allows you to create and link new GL journals for cases where the GL entry does not exist for a bank transaction.
Work with bank rec
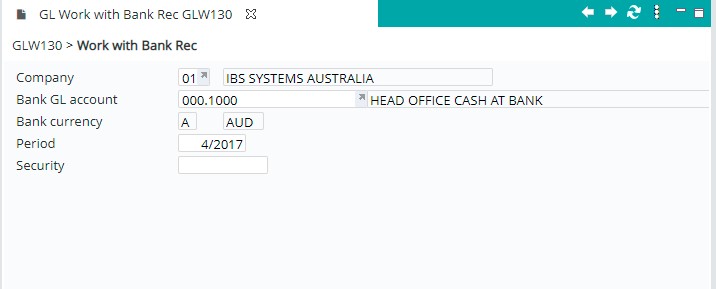
- In the menu expand, Base Modules > General Ledger > Other > Bank Reconciliation > Manual Bank Reconciliation and then double-click GL Work with Bank Rec. GLW130 Work with Bank Rec panel appears.
View available fields on this panel
| Field | Description |
| Company | This field defaults to your company code but may be overridden if necessary. |
| Bank GL account | General Ledger bank account for all bank deposits, Bank charges, Miscellaneous charges etc. |
| Bank currency | Banking currency being used. |
| Period | The current accounting period defaults. Posting to a previous period or future period is possible by entering the General Ledger security password. |
| Security |
A security password may be entered to bypass the General Ledger safeguards that prevent duplicate journal numbers as well as postings to a Period other than the current Period. A separate password is required for posting to previous period as specified in control file TMSGL/SEC. The error message Invalid security code will display if the period entered is not the current period. The error message Duplicate journal in period…Valid security rqd displays if a journal has already been posted and no Security password has been entered. |
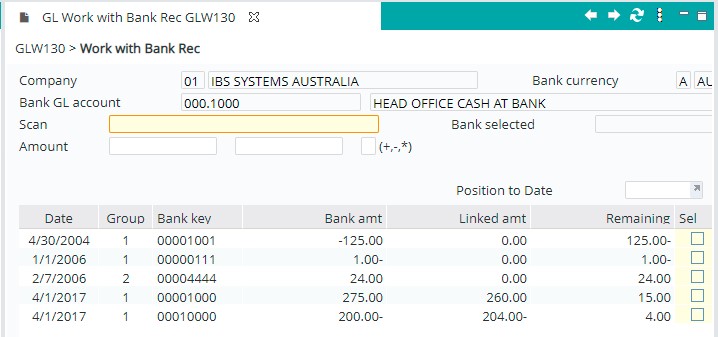
- Enter the above header information, as necessary and click OK to confirm. GLW130 Work with Bank Rec panel appears with the listing of Bank side entries by group/key where the remaining amount is yet to be matched to GL entry/entries.
Note: If there is more than one record with the same group/key, then they are added together here. If their dates are different, last date is shown.
| Option | Description |
| Detail |
Drills down to view the individual B & G side entry(s) with this group/key. If there are multiple entries, it will show list of these. |
| Unlink | This allows you to unlink an already linked Bank/GL transaction. At any stage before finalising the allocation you can unlink bank entries to clear out the link key allocations made with GL side. |
| Field | Description |
| Scan |
Scan field at this level allows user to search for ‘Bank’ records on GLBNK00P such as Trans Code, bank ref, cust ref, narrative, etc. It does not include Bank Group, Bank Key or Date, since you can use the Position To field for that. |
| Amount |
Amount from/to fields also allow filtering of which ‘Bank’ records to show based on Remaining amount
|
| Date | Transaction date as per the Bank statement. |
| Group code | This is the Group code relating to the transaction from the bank statement. This group code determines the transaction type. 1=Cheque, 2=Deposit, 3=Bank charges, 4=Miscellaneous charges, 5=Electronic payments, 6=Direct payments. TMSGL/BNK-JTIF defines what type of journal must be created for a bank reconciliation group code. |
| Bank key | Bank key of the bank transaction. |
| Bank amt | This is the original bank amount from the uploaded bank statement for the respective group/key. |
| Linked amt | This is the amount from GL side entries already linked to matching group/key. |
| Remaining amt | This is the amount from the Bank amount that is not already linked to existing GL side entries. |
| Sel | Checkbox to select transactions to allocate/link or unlink. |
| Linked key | Number allocated to a Bank transaction when its linked to a GL side entry. Linked key will disappear when the transaction is unlinked. |
- Select a transaction and right click Detail option to drill down to view the individual Bank & GL side entry/entries for the selected group key.

If there are multiple entries, it will show a list of these.
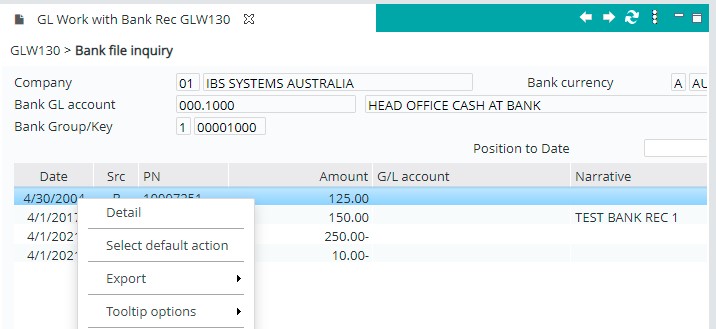
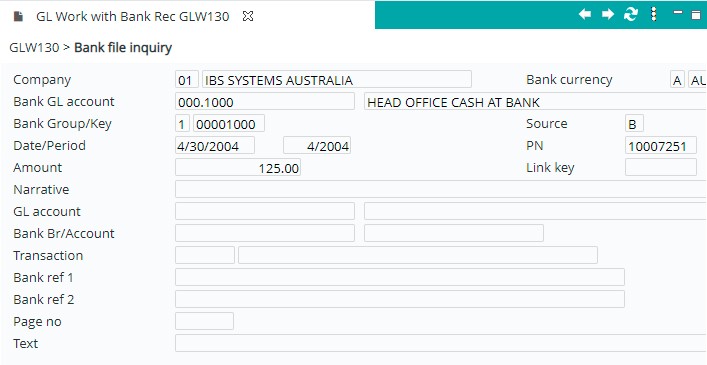
- You can right click and select Detail again to see additional details for each entry in the list. Where there is only one record for the selected group/key, then it will bounce straight to the detail panel, bypassing the ‘list’ panel.
Allocate/link Bank & GL entries
- Repeat steps 1 and 2 from GLW130 Work with Bank Rec (above). GLW130 Work with Bank Rec panel with unallocated bank side entries appears.
- Select one or more group/keys that you wish to allocate against GL side by marking the Sel check box. Optionally, you can override the allocation amount to allow partial allocation of the remaining balance. Allocation amount(s) will be added together and displayed in the Bank selected field as shown below.

- Click OK and confirm Bank side selection. The following panel will appear to allocate/link against GL side. Remaining balance is the total amount to be allocated/linked.

- Select one or more GL entries to allocate. You can do a partial allocation via overriding the Aloc amt.
- Click OK.

- When you finish allocating GL entries for the selected bank entry(s) and there is zero balance left to allocate/link, click OK and confirm GL side selection. The panel with Bank side entries will appear with linked keys.

A new function Finalise will be displayed and the bank entry(s) will now be assigned with a link key. At this point, you can repeat the above process to link other outstanding Bank entries to GL entries. Each time you do this, a new link key number will be allocated.
At any stage, you can right click and Unlink one or more of the bank entries to clear out the link key allocations made with GL side. When you press function Finalise, any remaining allocations/linking will be applied to Bank reconciliation file (GLBNK00P) after display of confirmation screen.
Alternatively, if you exit from this program, the allocations/linking will not be applied to Bank reconciliation file (GLBNK00P).
Create new GL entry for a bank transaction
There may be cases where the GL entry has not already been created for a bank transaction. When a Bank side entry is selected and there is no GL Side entry for it, the system allows you to create a new GL journal which will be automatically created into “GL” side of Bank reconciliation file (GLBNK00P) and linked to the currently selected “Bank” side entry.
- Repeat steps 1 and 2 from GLW130 Work with Bank Rec (above). GLW130 Work with Bank Rec panel with unallocated bank side entries appears.
- Select group/keys that you wish to allocate against GL side by marking the Sel check box.
- Click OK and confirm Bank side selection. Panel with unlinked GL side entries will appear.

- Click Create jnl. Work with Bank Rec – New Journal entry panel will appear allowing you to create new journal for the selected bank transaction.

- Prompt and select GL Journal Type.
Be aware that each GL Journal type is linked a specific bank group also, so ideally choose one that matches the group you want it to go into. As with normal GL Journal entry, you may optionally be allowed to override the GL Journal Number depending on the Journal Type. If no override given, IP1 will allocate next number available when you Finalise later.
Note: A temp bank group = # and bank key number will be allocated on the screen so that it is easy to identify new journals created during this ‘Work with Bank Rec’ process. Once you Finalise, this will be replaced with the real Bank Group & Key based on Journal type & Journal number above.
