Within the Accounts Payable module, there are following three methods of effecting payments to creditors.
- Computer produced cheques by automatic selection.
- Manually raised cheques (Prompt Payment/Already Paid Invoices).
- Electronic Funds Transfer by automatic selection.
| Payment stages |
TMSAP/BNK-PMT1 contains the flow to be used in the payment cycle. Each payment method to be used is defined (CHQ, EFT, EF2, FXP) plus the valid stages and the programs that relate to the stage. The following stages or progress codes apply in Account Payable payments process.
The programs to be used at print and finalize stages of the Payment cycle are defined in TMSAP/BNK-PMT2 and then entered against these stages for the applicable Payment types. Also defined are the work stages allowed from the current work stage of the Payment cycle. These are system defined and cannot be changed. For example Stage 4 print is not valid for EFT payments. |
||||
| Computer produced cheques |
This process is a five step menu process which must be followed in sequence. The menu options are as per below. Step 1: Select invoices for payment Step 2: Print detailed listing of creditors and invoices selected for payment. Step 3: Maintain invoices and creditors and invoices selected for payment. Step 4: Print Cheques Step 5: Update Cheque numbers into the system. Document type = CHQ |
||||
| EFT process |
Banks can be nominated to handle the cheque and associated remittance printing for customers who wish to outsource this process. Set up requirements needed for EFT processing involve control files, Creditor masterfile and the Document number file. An output file must also be created to receive the finalised payment transactions. TMSAP/BNK-BKCD stores all the available banks for use by creditors. The banks are defined by code, description and Swift code with the program (system defined) validating that the correct number of digits is entered for a bank account. Each bank/financial institution which will be used on the Creditor masterfile should be added to this control file. A Creditor must have a bank account entered on the Creditor masterfile before they will be selected for EFT payments. Before running EFT it is important to make sure a number sequence has been defined. This will be the number that the system automatically allocates to each EFT payment. These numbers are established in the Number file AP-DOCN and can start at 1 or any specified number. A journal number range is required for EFT payments. TMSAP/DT defines the document type for EFT which ensures that the creditor’s transaction history inquiry is updated with the EFT method and the audit trail separates cheque payments from EFT payments. If a new journal type for EFT payments is specified, for example ‘P’, this must exist in TMSGL/JNLT and have a valid number range and must not be used by any other source. This journal type can be the same for both cheques and EFT. The audit trail can be either set as ‘1’ or ‘I’ for invoices and credits, and payments as ‘2’ or ‘Q’. EFT payments can be processed via the Prompt payment method. TMSAP/APE030 must be set up accordingly. An EFT Prompt Payment is a single payment against multiple invoices for one creditor. For Prompt payments a file will not be produced. A manual entry will have to be made in “the bank” online. The default bank account to be used by the system for EFT payments is set up in TMSAP/BNK-PMTH. This is only a default and can be overridden at the time of payment. Creditor selection for EFT should always be set to yes. This flag is to ensure that the system will select by payment method and creditor bank code whether to pay or not. TMSAP/BNK-PPRG must have the number of the program that determines the Bank File format for EFT payments. TMSBK/EFT-DEF contains the EFT defaults for the direct payments file. It holds information needed when creating the bank upload file, like where the created file will be placed on the network/PC and the name it will be given. This will be where it is loaded for the bank to upload and has a format of folder name and file name. The folder must be created on the IBM Power Systems directory and available to all users who will be uploading the file into the bank application. Object authority on the folder should be public. Users will require access to the network drive. A folder must be set up on the IBM Power Systems network drive. The folder name to be used is the first name entered in the OUTFILE field (that is the network folder NABPayments, for example). Then the entry would be /NABPayments/NAB.ABA. The second name on the entry defines the name of the file when it is created. When the payment run is complete, you should be able to go to Windows Explorer and to the EFT folder on the IBM Power Systems network drive and see a file called payments. The file can be viewed through notepad but be careful not to save it when it has been opened. You should be able to upload the file as is without changing the file layout. Also in TMSBK/EFT-DEF define the Archive File. Field OUTFILE-A defines the file and path for the archived EFT file. Ensure that the path exists on the IBM Power Systems. Archiving allows the AP operator more flexibility in controlling the payment runs, by moving a file and running more than 1 before waiting for the file to be uploaded into the bank. In TMSAP/CHQ-PRT the program to be used to generate the file is required. For cheque payments this would be the remittance advice print program. The EFT payment method requires a program entered here for the generation of a file. The following five steps are for EFT payment process. These menu options must be followed in sequence.
When the update and cheque register is run the program updates the creditor with an EFT payment and a file is produced and copied to the PC using TMSBK/EFT-DEF. This program (APR650) will also produce the remittance advice file. The files must be uploaded into the bank via “the bank” online. This file should be available from the PC. Once uploaded archive, rename or delete the file. EFT payments can be cancelled if required. TMSAP/DT must be set up with both EFT (‘P’) and EFT (‘S’). The following payment file download programs are available.
|
||||
| Multi-cycle pay run |
To start the process, navigate to the Payment Cycle menu by selecting the following menu options.
TMSAP/BNK-PMTH contains the valid payment methods, a General Ledger account (to nominate the bank) for these and whether auto banking is required (that is no cheque and cheque/payment number to be automatically nominated). When auto-banking is selected (via the Payment method) then the selection process will be restricted to only creditors with valid bank accounts. Note that all creditors with bank details can also be paid via the cheque run, therefore it is important to always run the EFT cycle first. A couple of important rules established in TMSAP/BNK-PMTH are that the auto number parameter must always be set to MANUAL for cheque payments (0=No) and Creditor Selection for EFT must always be set to Yes to ensure that the correct Payment method and Creditor bank code are used.
Once the selection criteria has been entered, the program selects all applicable creditors and their approved invoices and flags them accordingly.
The total amounts of all selected transactions display for visual verification. The next step in the Payment cycle is printing the Cash Requirements report. This is optional and is only necessary if details of all selected creditors and invoices are to be viewed.
|
Select invoices due for payment
Using the Work with payment cycle, payment due selection can be made by: Company, Creditor Type or Currency. You have the option to select invoices for all companies, creditor types and currencies in a single run. Multiple overlapping processes can co-exist. The user interactively nominates invoices for payment using the maintenance option.
| Note | If a Payment cycle is in process and this option is selected the following message will be displayed: Due for payment selection not valid at this time. |
- In the menu, expand Base Modules > Accounts Payable > Other > Payment Cycle > Payment Cycle menu and double-click AP Multi-Cycle Pay Run. APW005 Work with Payment Cycle panel appears.
- Click Add. APW010 Due for Payment Selection panel appears.
| Field | Description |
| Run number | Payment cycle run number will be automatically generated as the next number from the current value in control number AP-PYRN. |
| Company/Group | Enter either the company or the company group code for which invoices due for payment are to be selected. You can select invoices for all companies (‘**’) or enter a specific company or you can select companies belonging to a specific company group. |
| Creditor type | Select the Creditor type for the Payment cycle being produced. You can select invoices for all creditor types (‘***’) or enter a specific creditor type. |
| Currency | Select the currency of the invoices that are to be selected for this Payment cycle. You can select invoices for all currencies (‘*’) or enter a specific currency. |
| Description | Enter a description that will relate to this specific Payment cycle. |
| Payment method |
The Payment method selected determines whether or not auto banking is required for this run which entails the system automatically nominating the cheque number and/or cheque and payment number. If auto banking is being selected then only creditors with valid bank accounts are selected. This caters for processing EFT payments. This also uses TMSAP/BNK-PPRG. For SEPA payment method the transfer of funds would be initiated automatically when the program is run. |
| Select due date |
This is the due for payment date of the invoice or the due to be taken up date of the Credit Note, based on the calculation made when the invoice/credit note was originally entered in the system. The calculation is based on the Invoice date and the Payment terms conditions and the current processing period. In Credit Note processing it is the date a particular Credit note was taken up. Transactions up to and including the date entered will be selected. When the invoices were entered on the system the Due date was either calculated according to the Invoice Date and Payment Terms or overridden by the operator. The Due for Payment Maintenance program can be used to amend due dates of transactions if necessary. Prompt payments have a Payment terms code of 00 which defaults a Due Date of 00/00/00. If a prompt payment run is to be processed, enter zero in this field. |
| Limit no. of payments | An optional field used to specify the maximum number of payments to be made in the Payment cycle. |
| Allow negative payment | Negative payments can be allowed to offset any credits against the creditor. |
| Creditor number (From/To) |
A Payment run can be processed for one creditor, or all creditors that match the rest of the selection criteria. |
| Creditor name (From/To) | An optional entry field allowing a Payment run to be processed by Creditor name. |
| Payment amount (From/To) | A range of values can be selected for inclusion on this Payment cycle. |
| Tax category list (I/O) | Up to 12 Tax Categories can be included or omitted when selecting a Payment Cycle. If the columns are left blank, the full range will be selected. |
| Total no of invoices | When <ENTER> is pressed, the system goes through the files selecting the transactions that match the selection criteria entered. The total number of invoices selected displays here. |
| Total no of payments | The number of payments printed by the Remittance/Cheque Print menu option displays here. If this stage of processing was not reached, this is 0. |
| Total payment amount | When <ENTER> is pressed, the system goes through the files selecting the transactions that match the selection criteria entered. The total of the invoices less the credit notes, gives the Total Payment amount for this Payment Run. If a foreign currency was part of the selection criteria this amount will display in that currency with an indication of the nominated currency displayed alongside. The total payment amount will not display if multiple currencies have been selected. |
- Enter the above information as required.
- Click OK.
- Press <ENTER> to confirm. From the panel that is displayed, you can view the total number of invoices due for payment, the total number of cheques received and the total payment amount.
| Note | For EFT Batch Payment the system will select invoices by using the same criteria although it will only select from creditors with bank numbers entered on the masterfile. Cheque Batch is run first if you want to pay a creditor with Bank details held on the masterfile, by cheque. |
Produce cash requirements report
This option is selected to print a report that lists all transactions selected in the previous step of the payment cycle, which was due for Payment selection. This is an optional step. The payment cycle can be cancelled before or after this Report is printed. There are options that determine the details that print on the cash requirements report.
- In the menu, expand Base Modules > Accounts Payable > Other > Payment Cycle > Payment Cycle menu and double-click AP Multi-Cycle Pay Run. APW005 Work with Payment Cycle panel appears.
- Click Filter. APW005 Work with Payment Cycle panel appears.

- Specify one or all of the following criteria. This will narrow the selection of a specific Payment Cycle with which to work.
- Company/Group
- Creditor Type
- Currency
- Click OK or press <ENTER> and you are returned to the previous panel.
- Select the relevant line and click option Work with Cycle. The following Work with Payment Cycle panel appears.
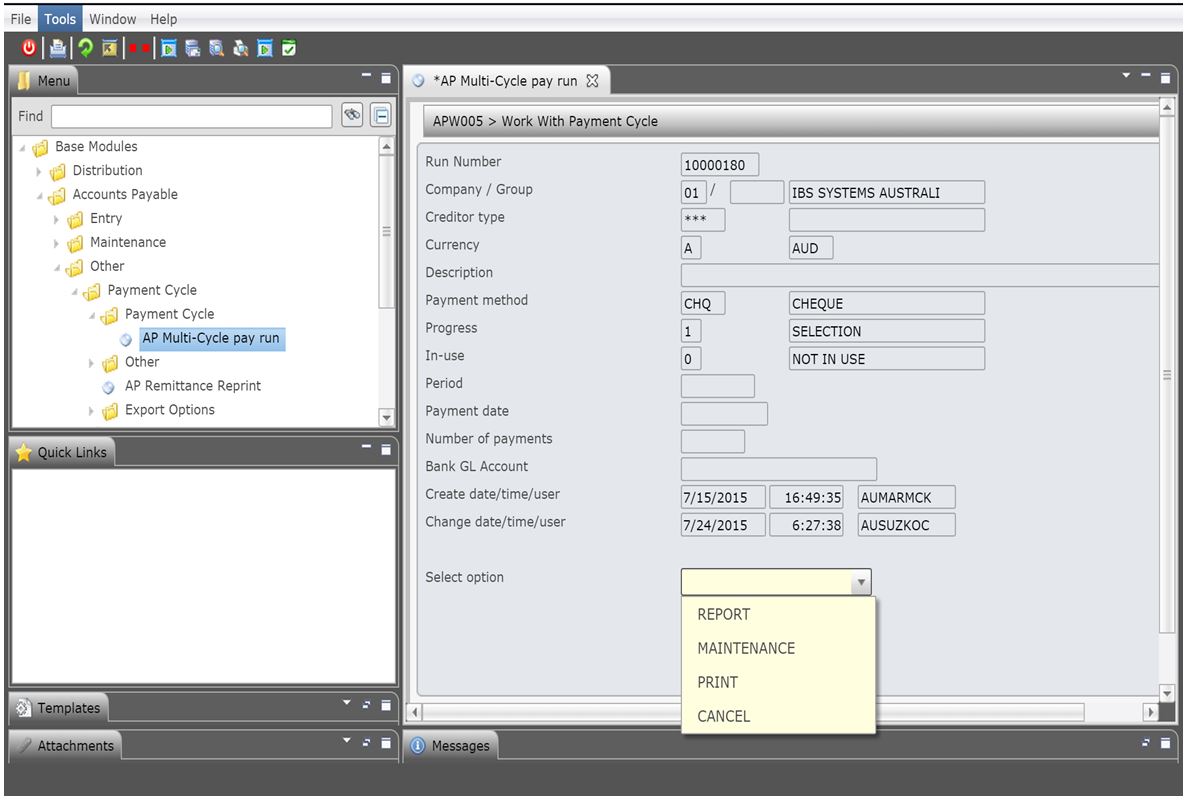
| Field | Description |
| Progress | This is the current stage in the payment cycle. |
| In-use | If a user is attempting to select an option in the payment cycle to run while it is being run then this flag will display the stage that is currently being run by the other user. |
| Select option |
Report – generates the Cash Requirements report. You have the option to generate either a summary or a detailed report. Maintenance – used to manually flag invoices for payment Print – used to print the remittance and cheques Cancel – used to cancel a payment cycle. Finalise – displays once the print option has been performed and is used to finalise the Payment Cycle. |
| Note |
Depending on the set up in TMSAP/BNK-PMT1 Report will be part of the Cycle Flow and therefore displayed as an option. The report is sequenced by creditor name or creditor number and lists all transactions selected in the previous step of the payment cycle, which was due for Payment Selection. This is an optional step. The payment cycle can be cancelled before or after this Report is printed. There are also options that determine the details that print on the Cash Requirements Report. For instance all creditors selected for this payment cycle or specific creditors. |
- Select Report from Select option dropdown and click OK. APW015 Cash Requirements Report panel appears.
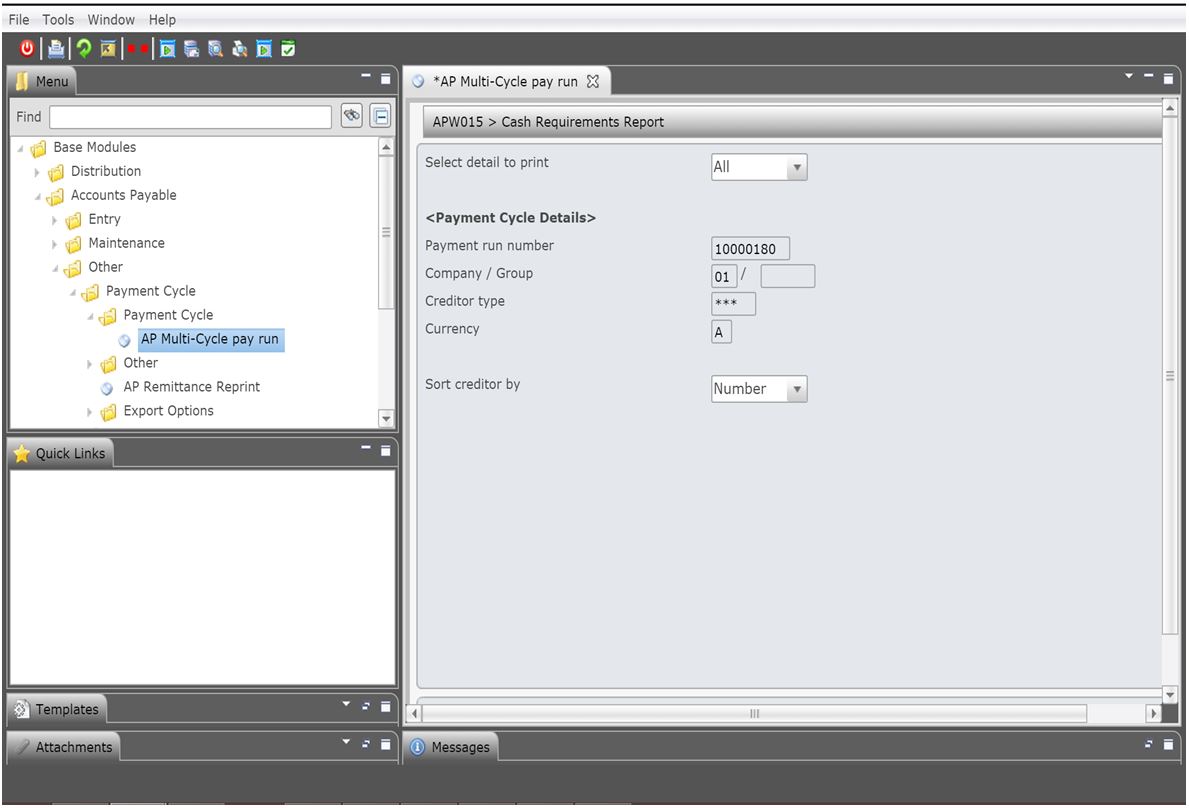
- Select the details to print and click OK. The report gets generated.
